Category Archives: Christmas

Christmas Traditions

Our Christmas TreeThis year, Eva my eldest invented a new tradition in our household.

Decorating the tree at Christmas is the first stage of building the excitement for the big day so I put it up quite late to try and keep things calm for as long as possible. We actually put it up a week before Xmas day which felt a bit early and even more so when looking after them during the week that followed as the girls were simply buzzing! I’ve never seen Eva so EXCITED on a daily basis!

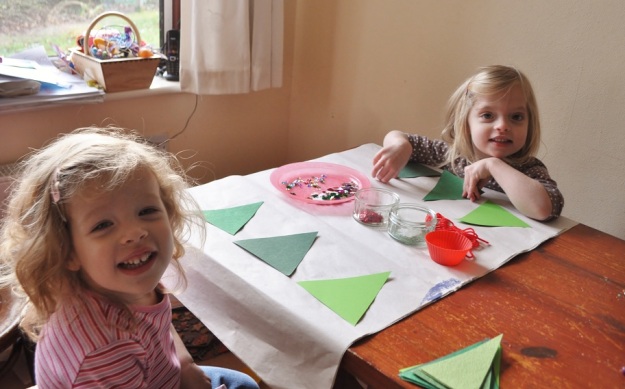
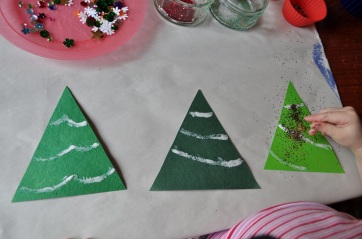
 Anyway, we set up the tree and spent a good couple of hours decorating it with the much loved old decorations, a few new ones and lots of new handmade ones by the girls. I am slightly OCD with it – as I ‘help’ the girls whilst they decorate, but in fact I am surreptitiously moving things around to create the look I want 🙂

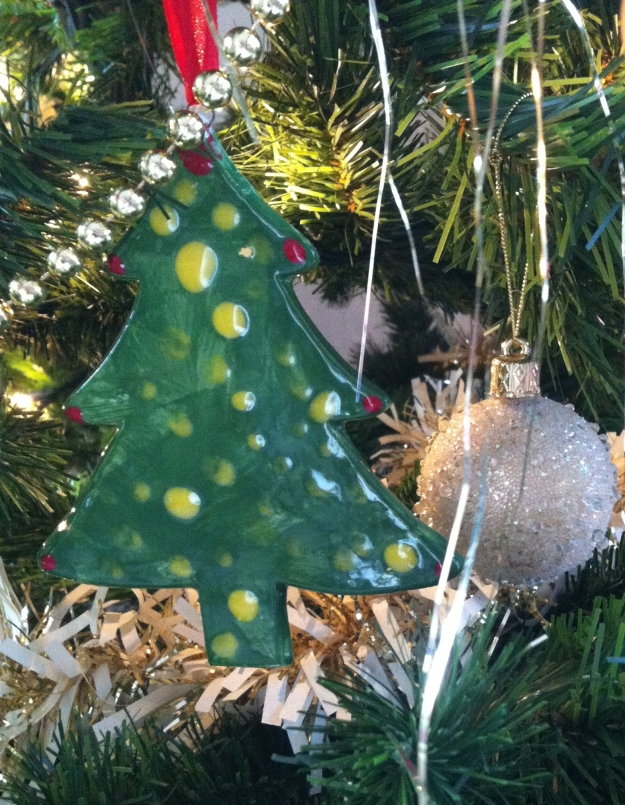
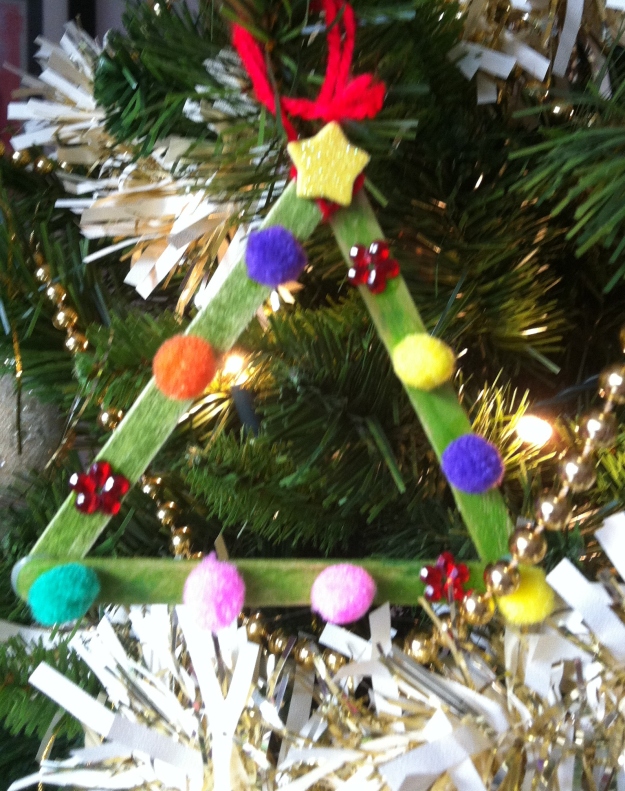
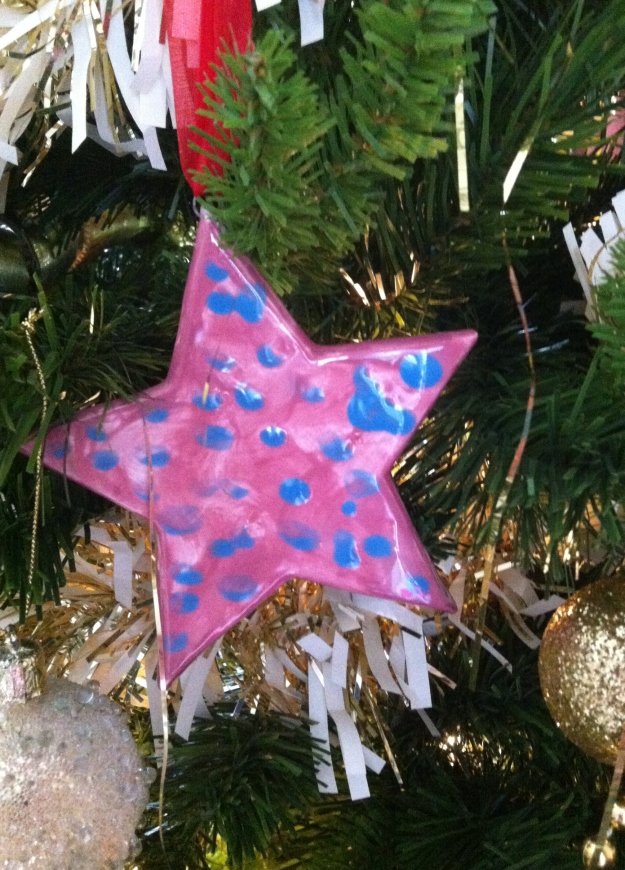
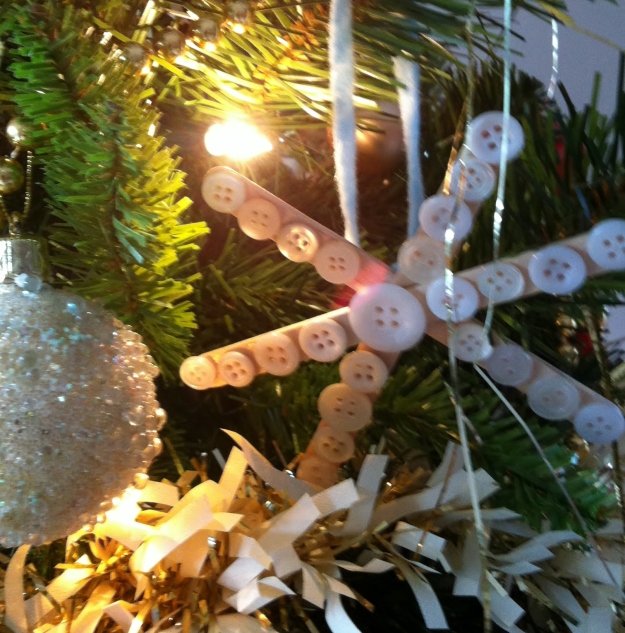
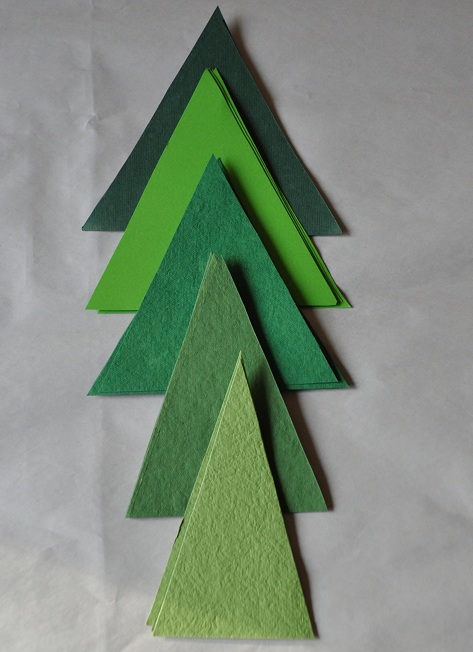
Here are a few of the girls decorations they have done using painted pottery, the lollypop decorations we did the other week and my favourite, Angela the Angel from the Woolly Mammoth craft packs we subscribe to. I love our tree this year, there is so much to see on it!

 Xmas Tree Dec Toddler Crafts Star Snowflake Handprint Eva

  Handmade angel for toddlers


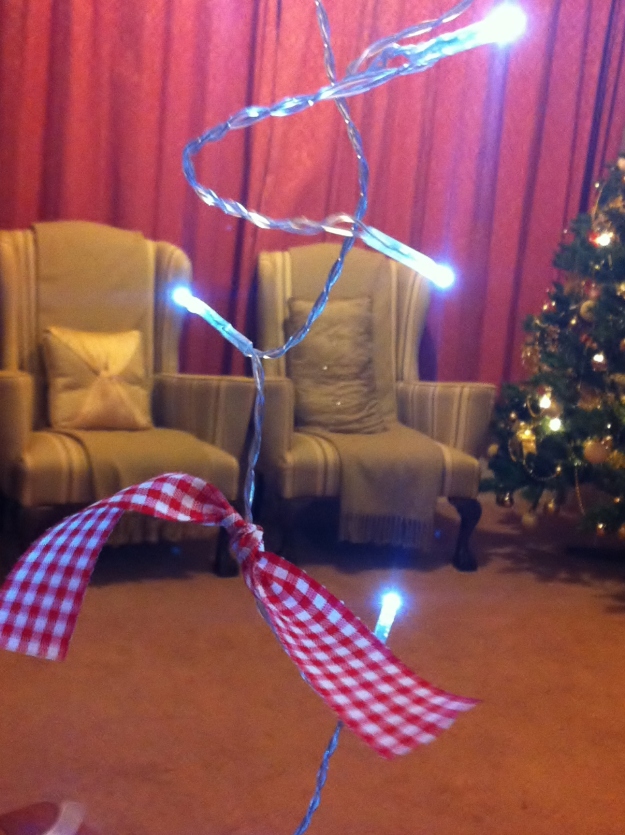
Whilst we are doing this Eva is going on about singing songs when we have finished, which she soon developed in to sitting around the tree singing songs ‘like when you camp and sit around the fire’. To be honest I just wanted to finish and have a cup of tea- its tiring work directing children without them knowing it, keeping them focussed and containing their excitement! The tinsel kept finding its way around table legs or childrens necks, heads, arms and the poor star on top the tree, well that was stood on, carried around, dropped – the glitter covering it definitely got a few war wounds this year and obviously both of them wanted to put it on top of the tree, so that was interesting – My husband and I took a child each whilst they held on to a point of the star each and we lifted them up so they could do it together – that would have been a great photo opportunity seeing as I had to have my arms at full stretch to reach plus holding the weight of a child, think my face probably took on the resemblance of a tomato for a few seconds!

When we were finished, we indulged Eva in her idea with my hubs, Greg, playing Christmas songs on the piano and the girls and I sitting around the tree singing along and it was really lovely! We are going to make it a tradition every year once the tree has been decorated! Well done Eva!! 🙂

Do you have any Christmas traditions that you do every year without fail?

Wishing you all a very HAPPY and HEALTHY New Year – Bring on 2013!

Ribbon & Light Garland

Ribbon Garland

 
One of the things I love about Christmas is the glow of lights especially with the dark and cold of our british winter so any excuse to use them!

Ribbon Garland


 This is so simple a child could do it!

I just cut each ribbon 8 inches long and tied it to the set of lights with a simple knot.

I used battery operated lights so I could hide the battery box and not have wires trailing to the plug socket.


Ribbon garland


I used all sorts of ribbon scraps. I wanted to have a red and white theme so I bought some ribbons specifically and used some I already had. It needed a bit of bulking out so I cut up some strips of felt to make it fuller.

Ribbon and Light Garland


It really cheers up our fireplace and I think would look good in any colour combination for any occasion.

Lolly Stick Christmas Decorations

Toddler Xmas Crafts
Just a couple of quick ideas here – we’ve been crafting all week and the girls are really getting in to the Christmas spirit.

We made these easy decorations using lolly sticks but you could use twigs or thick card.

Lollypop snowflake
 I hot glued the lolly sticks into a cross shape then added another straight through the middle.
The kids dotted big-ish blobs of glue with a paintbrush and then picked out and added their buttons. I cut some felt and added it to the back with hot glue.

Lollypop TreeFirst we coloured the lolly sticks with green felt pen.

I then hot glued the sticks in to a triangle and the girls dotted glue and added sequins, pom poms and jewels.

I added some wool to the back for hanging.

lolly xmas tree
 
We hung them up on our tree and I’ve got to say I love our tree this year. There are lots of the childrens decorations on it now which makes it really special to me.


If you don’t have buttons, you could just use glitter (usually our first choice!) or use silver sequins or even paper circles – any small embellishment could work.

Kids Christmas Tree Garland

Getting stuck InI know its only the 1st December but we are soooo excited about Christmas in our house that I thought we would make a start on some decorations that the girls make themselves and hopefully can bring out each year until they are literally falling apart plus we needed cheering up as we have been unwell all week.

This project was brilliant. The girls loved decorating the trees and I loved the end result. This is what we did:

Cut Triangles


 I cut some triangles out of green card – I had a few different shades but just one shade of green would be just as great. I also cut mine different sizes but again I really don’t think that is important.


Setting Up

 
I set the girls up in a bit of a production line but they ended up just doing one at a time. I put pots of glitter, gems, pom poms, wool, sequins, anything I could find that they could use to decorate the trees. 


Glue and Sparkle

 
For a few of the trees I put the glue on so they could specifically create a tinsel effect with sparkle. The reason being I knew once the girls got started the trees could potentially all look the same so I thought it would distinguish a few as actual Christmas trees. 


In Progress

 
In fact I needn’t have worried as they loved the effect and my 2 year old exclaimed ‘They’re really great!’ about 3 times and then they both did their own tinsel lines on a few. They both really impressed me with how creative they were, I gave them a few ideas (of course, I can’t help butting in!!) and they crafted for aaaaagges! 
 

Once they were all done, I left them to dry and put the garland together when the girls were in bed.

Painted on Glue 
I decided to put discs of red card in between to make the garland longer (plus I have ajust bought a 2inch hole punch and reallly wanted to try it out :D….win!) So I decided on the words Happy Christmas and took a paintbrush and painted a letter in glue on each circle.


Glitter Letter


You can never have enough glitter, right?!

I just sprinkled glitter all over it, tapped it off and left it to dry.

The girls could have helped with that bit if they hadn’t been asleep.


To put it all together all I did was use a large needle and some festive red twine.

Sewing the Garland


Then I just sewed in from the front, around the back of each item and then back out to the front in roughly the same place opposite the first hole.

Like this —————————————>


A couple of tips here:

  • Layout your peices in order across the floor and sew them there, it doesn’t take long and you can instantly see your next peice to thread.
  • Make sure you leave a reasonable length of twine on the needle so that you have enough twine to hang your garland up.
  • When I threaded the needle and pulled a good couple of feet through (for hanging) I didn’t cut the twine, I just left it on its roll and cut it when I had finished the sewing. This way I could make sure I had enough.
  • I found it easier to pierce the card with the needle from the front in both places first, then sew, that way when you come through from the back you already have the hole in the right place.

Here are a few of their decorated trees. Its great when you do these things, to see just how capable little ones are and I learn things about them every time. My little two year old was so colour co-ordinated which I haven’t really noticed before. She had to have all the same colours on her tree or two colours that matched together! You can tell which ones are hers! And the older one copied every technique I showed her, for herself. It makes me very happy to have such great crafting sessions together.Christmas Tree made by kids

Here is our finished garland in place in the hall, its a really bare area so has brightened it up and I couldn’t get a good photo of it but trust me, it looks absolutely adorable! I love it!!

Christmas Tree Garland

Play Felt Christmas Tree Tutorial

Child Friendly Christmas TreeIntroducing the child friendly Christmas tree!

Its completely made with felt which is fairly cheap and no sewing required which basically means it doesn’t take that long to make unless you faff like I do Hoooraaay!!! The idea is that the kiddo’s can dress the tree themselves and re-dress it as much as they like – as felt sticks to felt on its own – so no messy stuff – its a winner!!

I have made one each for the girls bedrooms so even if the novelty wears off they will still love having their own Christmas Tree in their bedroom.

Here is my littlest one trying it out and was engrossed from the start!

I’m going to keep this as brief as possible – its basically self explanatory but I have used a couple of techniques to make it easier which I will expand upon.

Ingredients

  • Green felt (1 -1.5metres depending on size-my tree was 42” wide and 38″ tall)
  • a selection of coloured felts
  • Ruler
  • Pen for marking the felt
  • Scissors

Optional Extra’s

  • Vilene Bondaweb (iron on adhesive) 1/4 a metre
  • Heat n Bond Lite 1/2 a metre max
  • Rotary Cutter and Mat

First I drew out my Christmas tree shape – NIGHTMARE! I wanted it to look symmetrical but can’t seem to draw a Christmas Tree freehand on felt so here is how I did it. Its not as complicated as I probably make it sound!

First draw a triangle as big as you want the tree – you could leave it like that and cut it out – young children will not mind one bit BUT I do 🙂 so I then divided up the length of one long side of the triangle – I started by measuring 6 inches down from the top then 8 inches for the rest of the branches see 1st pic below.

Then at the first point I measured a 1 inch line coming in from the side then at each point increased it by 0.5 inch (to make bigger branches) Phew nearly done! Starting at the top point I used a ruler to join up the inner end of the line to the outer end of the line below it and did that all the way down and repeat on the other side (see middle pic)

Once happy – Cut it out! Click on the photo below to enlarge it, its not great but you’ll get the gist.

Now cut out your decorations – the great thing with felt is it doesn’t fray so just cut out your shape and you are done! They can be as simple or as intricate as you like.

Felt tree ornamentsI used a ramekin dish to cut out the baubles. The snowflakes took me a while to figure out but I found a template online and once I got one right I just used it to cut around the rest.

I embellished the crackers, presents and candy canes by using the iron on adhesive.

All you need to do is cut out what detail you want to add in felt, iron on the adhesive which has paper on one side, take the paper off and place it on the decoration and re-iron to bond both together. Simples!

You could of course sew the felt together or use glue.

Now for the best bit… putting it up! You could use drawing pins if you’re not worried about damaging the wall otherwise 3M Command strips would work or if its going straight on to brick you could use a hot glue gun as it will peel straight off but I used Heat n Bond Lite which allows you to IRON FABRIC STRAIGHT ON TO THE WALL and it will easily peel off with no mess!! Can you believe it! Imagine the possibilities. I tested it in both rooms as the wall coverings are different and it worked. I first discovered it over at The Brassy Apple and have seen it used on all sorts of projects elsewhere but test an area first though as its not actually designed for that!

I cut the HeatnBond in to strips, using a rotary blade and mat, then ironed on strips all the way around the tree and a few in the middle.

Just take off the paper and iron on – I did need some help getting the felt straight and keeping it smooth though as its quite big.

Now decorate until your hearts content. I did think that as I had made 24 decorations I could make it in to an Advent Tree by giving them one decoration a day but I knew I wouldn’t be able to resist so I let them both have a play before hiding the decorations away for a couple of weeks.

It got a thumbs up from the girls and I think its a really cute way of keeping their hands off the real tree especially for really young ones. Its probably best suited to 1-3 year olds although I only made one for my eldest who is 4 as I thought she would feel left out, but she really enjoyed dressing the tree and even more so loved having it in her room so who knows what the age limit is!

Hope you enjoyed the tutorial.

 Gem x

The original source for this project was from Johnny in a Dress!

Felt Heart Decoration Tutorial

I love hearts and have them all over the house in all sorts of guises – fabric, wood, coloured glass, buttons…you get what I’m saying right! AND I just started working with felt and absolutely love it, it’s SO easy to work with. I combined the two and it led me to these little cuties and they were really simple so if you would like to make them here is a quick tutorial.

Ingredients
-Felt for the front of the heart – I used patterned felt but plain would be great too. My hearts are about 10cm
-Plain felt for the back – I used a glittered white on the red ones – any chance I get to use anything glittery I take it!! The white is about 14cm.
-Toy stuffing or pillow stuffing or you could just use cotton wool
-White embroidery thread
-Ribbon – mine is 9cm before folding but you can make it as long as you like (p.s briefly hold a lighter to the ends to stop it from fraying)
-Button

Patterned felt

First up -cut out your hearts, I usually wing it and free hand the shape I want on the back first, but its best to draw a template on paper cut it out and either pin it on the felt then cut around or use it to then carefully draw around before cutting out.


 Place your heart on the felt you are using for the back, put a pin in the front to keep it steady and cut around with pinking shears to get that zig zag edge. I don’t make it perfect at this point, I do a final trim up at the end.

Sewing felt

Now take your thread – I use three strands of thread, knot the end and come up through the top felt heart first as that hides the knotted bit in between the two peices. I use a basic stitch around the edge; coming up through the felt (pic 1) and then straight back down (pic 2) just avoiding the edge of the top felt heart. I do this all the way along, making each stitch evenly spaced and about the same size but stop to leave a gap so we can…….


Stuff it! I use something blunt and thin to gently push the stuffing in to the curves, like the end of a pen…..


Then close up the gap in the same way as you did the other stitches. All you need to do now is fold your ribbon with the ends to the front of the heart, place it near the top and put the button on top of that and secure with a few stitches.


Hold it up and go aaaaahhhh!!

Here is a blue one too that I did with fabric but fabric frays so I backed the edges with iron on interfacing first.

Thanks for reading and I’d love to see your efforts if you do make any!